As Ethereum network activity continues to rise, users often face high gas fees and slower transaction times. Polygon has emerged as one of the most reliable Layer 2 scaling solutions that help traders and DeFi users enjoy faster, cheaper, and smoother transactions. Bridging ETH to Polygon lets you benefit from low-cost trading, instant confirmations, and access to a thriving ecosystem of decentralized apps, NFT projects, and staking opportunities.
This guide will explain how the ETH to Polygon bridge works, how to complete the process safely, and what to expect in terms of gas fees, transaction times, and common troubleshooting tips.
Understanding How an ETH to Polygon Bridge Works
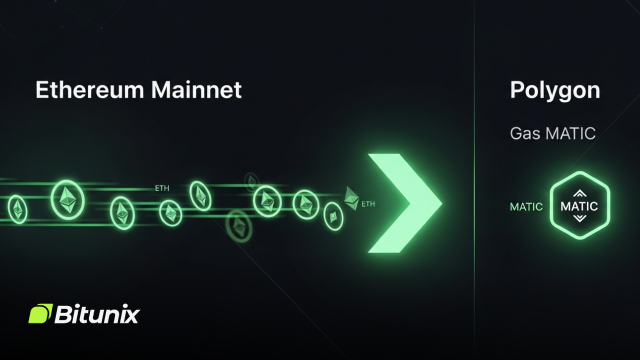
A blockchain bridge is a protocol that allows users to move assets between two separate networks. When you bridge ETH from Ethereum to Polygon, the bridge locks or records your deposit on the Ethereum mainnet and then releases or mints the equivalent amount of ETH (PoS) on Polygon.
This process is not a swap but a cross-chain transfer that gives you a representation of your ETH on the destination network. You can then use your bridged ETH for DeFi activities, liquidity pools, or NFT purchases while paying only a fraction of the gas costs compared to Ethereum.
There are two main types of bridges used for Ethereum to Polygon transfers:
- Official Polygon PoS Bridge – The canonical bridge integrated with Polygon’s ecosystem. It offers high reliability, full compatibility, and strong security alignment with Polygon’s validators.
- Third-Party Liquidity Bridges – These use liquidity pools on both networks to speed up transfers. Examples include Hop, Across, and Stargate. They are often faster but involve an additional trust layer through validators or relayers.
Both bridge types serve different needs. The official bridge is best for security and large transfers, while third-party bridges are ideal when you need speed.
Benefits of Bridging ETH to Polygon
- •Lower transaction costs: Polygon’s fees are a fraction of Ethereum’s gas prices. Even frequent DeFi actions remain affordable.
- •Faster confirmations: Transactions on Polygon confirm within seconds, improving trading and staking efficiency.
- •Access to diverse dApps: Polygon supports thousands of DeFi and NFT platforms, including Aave, Quickswap, and OpenSea.
- •Flexible movement of funds: You can transfer back to Ethereum whenever you need, using the same wallet address.
- •Scalability and security: The Polygon PoS Bridge is aligned with Polygon’s validator network and maintains strong security parameters.
These advantages make Polygon an ideal ecosystem for both beginners and experienced crypto users who value performance and reliability.
Before You Start: Quick Checklist
- •A supported wallet such as MetaMask, Rabby, or Coinbase Wallet.
- •ETH for gas fees on Ethereum, as bridging requires one transaction on mainnet.
- •Sufficient funds for the bridge amount and fees.
- •Your destination wallet address should be the same on Polygon since both networks use the same Ethereum-compatible address format.
- •A small amount of MATIC on Polygon for future transactions.
- •Official links only from the Polygon documentation or your saved bookmarks to avoid phishing sites.
Step-by-Step: How to Bridge ETH Using the Polygon PoS Bridge
Step 1: Connect Your Wallet
- Visit the official Polygon Portal.
- Click on Bridge and then Connect Wallet.
- Choose MetaMask or your preferred Web3 wallet and approve the connection.
- Ensure your wallet network is set to Ethereum Mainnet.
Step 2: Select Assets and Network Direction
- Set From: Ethereum and To: Polygon PoS in the interface.
- Choose ETH or another ERC-20 token you wish to transfer.
- Enter the desired amount. Start with a small test transaction if it is your first time.
Step 3: Approve and Confirm
- Approve the token if requested (ETH usually does not require this step).
- Click Transfer and confirm the transaction in MetaMask.
- Use a competitive gas setting to ensure the transaction goes through quickly.
Step 4: Wait for Confirmation
The bridge will display a progress bar showing the confirmation stages. Once your Ethereum transaction is verified, ETH (PoS) will appear in your Polygon wallet.
Step 5: Switch Network and Verify
After the bridge completes, switch your wallet to the Polygon network. If you do not see Polygon, add it manually using the following parameters:
- •Network Name: Polygon
- •RPC URL: https://polygon-rpc.com
- •Chain ID: 137
- •Currency Symbol: MATIC
- •Block Explorer: https://polygonscan.com
You should now see your ETH balance reflected on Polygon.
Withdrawing Back to Ethereum
When you are ready to move funds back, you can use the same Polygon PoS Bridge in reverse. Withdrawals involve two steps:
- Initiate Withdrawal on Polygon: This burns or locks your tokens on Polygon.
- Finalize on Ethereum: After Polygon checkpoints your transaction, you can claim your ETH back on Ethereum.
This process usually takes from one to three hours depending on checkpoint intervals.
Alternative Bridges for Faster Transfers
If you prefer faster settlements, third-party bridges such as Hop, Across, Stargate, and LI.FI offer near-instant transfers using liquidity pools. They work by releasing assets from an existing pool on Polygon once your deposit confirms on Ethereum.
The main advantages are speed and convenience, especially during high traffic periods. However, these bridges rely on validators or relayers, which adds a minor trust factor. Always use reputable and audited providers.
Understanding Costs and Gas Fees
- •Ethereum gas fee for initiating the transfer (this is the main cost).
- •Bridge fee for third-party services (the official bridge does not charge a percentage).
- •Polygon gas fee for using funds after arrival, which is minimal.
- •Withdrawal fee when moving assets back to Ethereum.
To minimize expenses, try bridging during off-peak hours when gas prices are lower.
Security and Best Practices
- •Only use verified URLs from official sources.
- •Test with a small amount before transferring large sums.
- •Use a hardware wallet whenever possible.
- •Keep ERC-20 token approvals limited to reduce exposure.
- •Revoke unused permissions periodically using tools like revoke.cash.
- •Never interact with unsolicited airdrop or bridge messages.
Following these measures ensures your cross-chain experience remains safe and reliable.
Troubleshooting Common Issues
- •Pending Transaction: Use the “Speed Up” option in MetaMask with a higher gas fee.
- •Funds not visible: Switch to the Polygon network and check your wallet or Polygonscan.
- •Delayed withdrawals: Wait for the checkpoint confirmation before claiming on Ethereum.
- •Incorrect address: If you sent to your own wallet’s other app, import the same key. If to a random address, recovery is impossible.
Conclusion
Bridging ETH to Polygon is one of the most efficient steps to access faster, cheaper, and scalable DeFi opportunities. Whether you are trading, farming, or exploring NFT platforms, Polygon provides the speed and cost-effectiveness Ethereum users have been seeking.
Start small, follow safety guidelines, and always double-check the links you use. Once you get familiar with the process, bridging will feel as simple as a regular on-chain transfer.